Installing Memory
CAUTION
Static electricity can damage dual in-line
memory modules (DIMMs). When
handling DIMMs, either wear an
antistatic wrist strap or frequently touch
the surface of the DIMMs’ antistatic
package, then touch bare metal on the
printer.
If you have not already done so, print a
self test/configuration page to find out
how much memory is installed in the
printer before adding more memory. See
Self Test/Configuration Page.
Note
If the self test/configuration page does
not print in your language, see Printing
Special Pages.
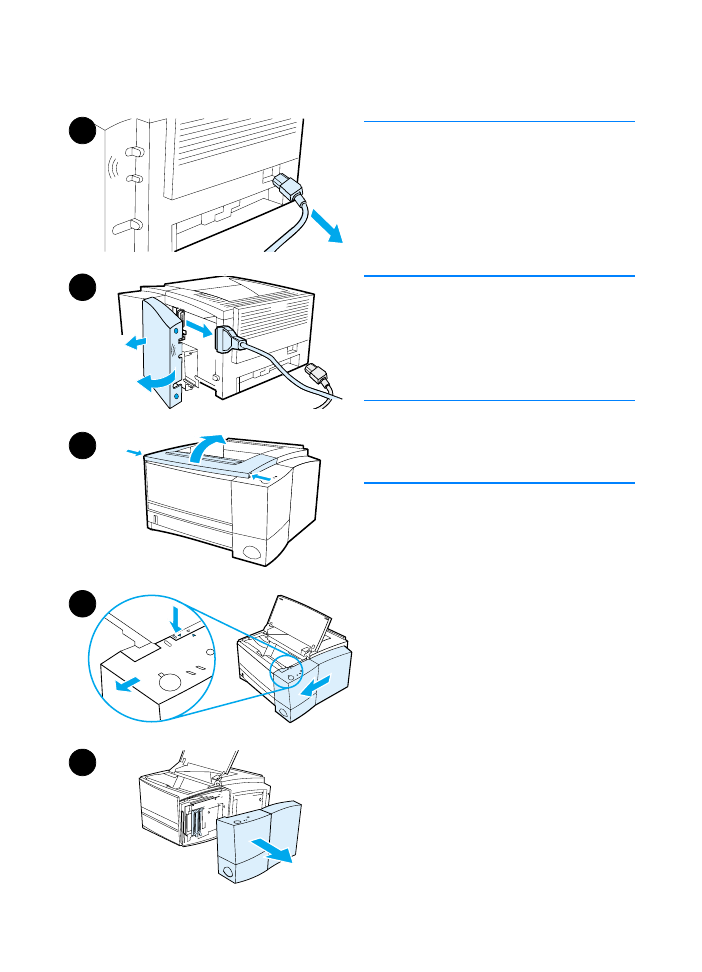
1
After the self test/configuration
page is printed, turn the printer off
and disconnect the power cord.
2
Open the interface cable door by
pressing on the release tabs and
swinging the door outward.
Disconnect all interface cables.
3
Open the top cover.
4
Press the release button and slide
the right side panel forward until the
alignment arrows line up.
5
Pull the panel away from the printer,
exposing the available DIMM slots.
Continued on the next page.
1
2
3
4
5
144 Appendix C Printer Memory and Expansion
ENWW
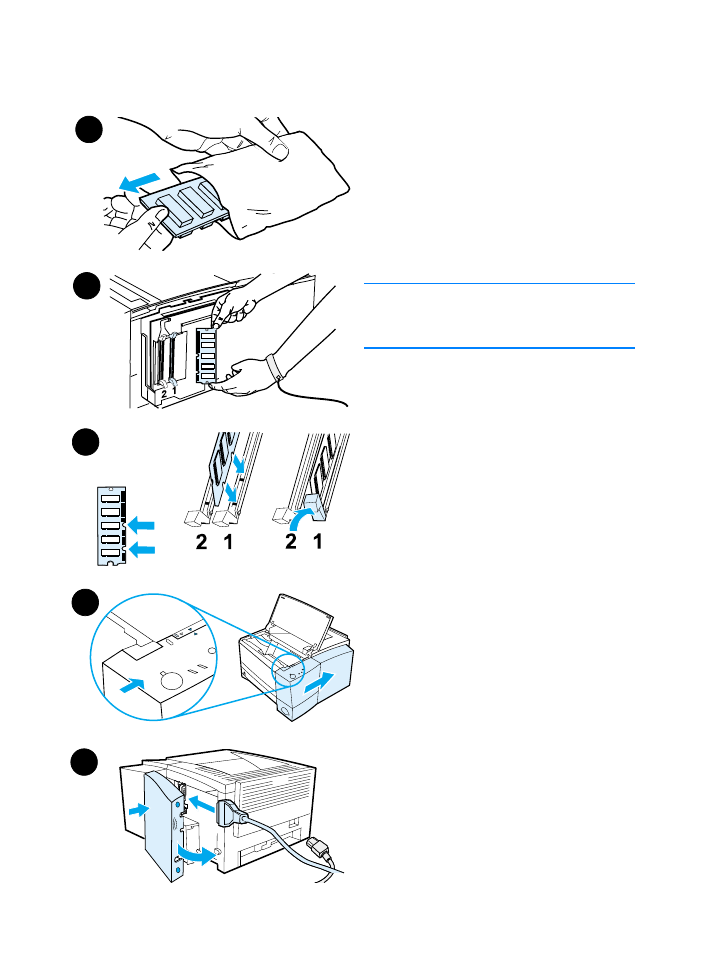
6
Remove the DIMM from the
antistatic package.
7
Holding the DIMM by the edges (as
shown in the illustration), align the
notches on the DIMM with the
DIMM slot. (Check that the locks on
each side of the DIMM slot are
open.)
Note
For best results use DIMM slots in 1-2
order.
8
Press the DIMM straight into the
slot (press firmly). Make sure the
locks on each side of the DIMM
snap inward into place. (To remove
a DIMM, the locks must be
released.)
Repeat steps 6, 7, and 8 for each
DIMM being installed.
9
To replace the side panel, line up
the alignment arrows and slide the
panel backwards until the release
button latches into place. Close the
top cover.
10 Reinstall the interface cable(s) and
power cord. Turn the printer on.
7
8
6
9
10

ENWW
Appendix C Printer Memory and Expansion 145